Once your automation has determined the appropriate conditions based on your decision recipes, the next step is to execute a trade. This is where Open Position Actions come into play.
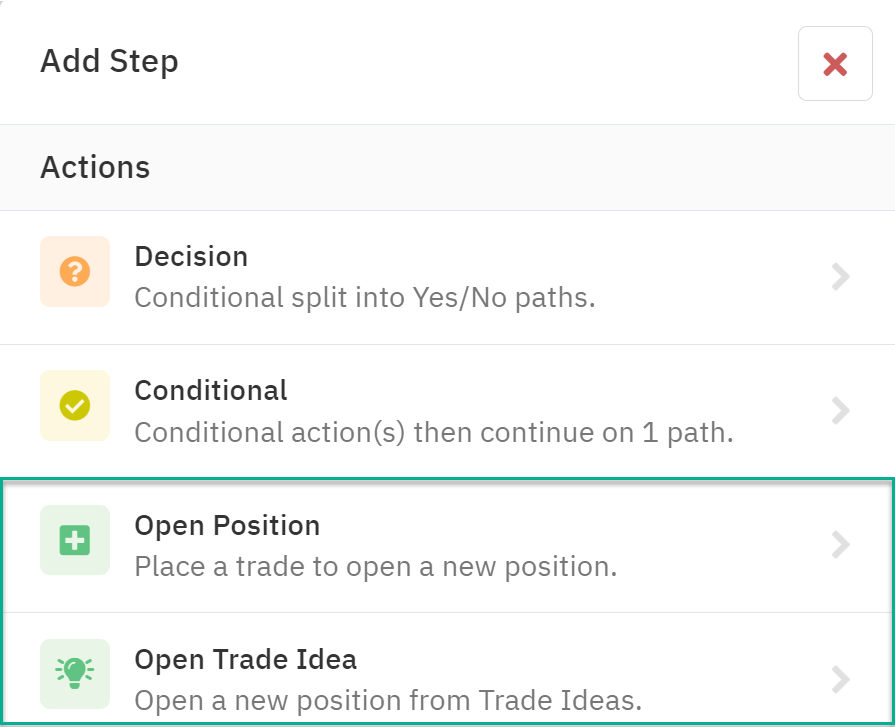
Open Position Actions
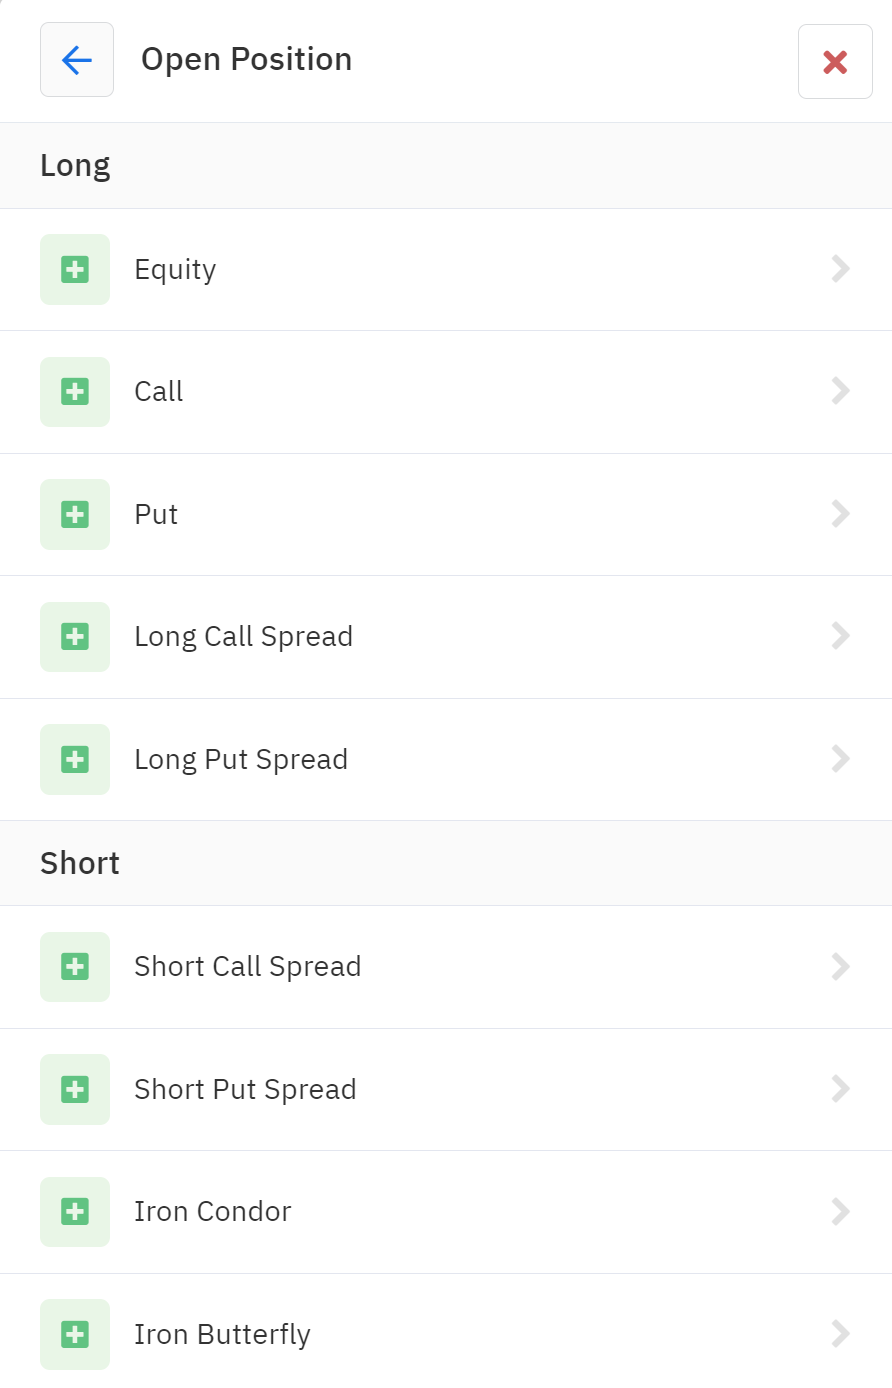
Open Position Actions allow you to initiate various trade types based on your automation's logic. The available options include:
- Equity: Open a long position in a specified equity.
- Options:
- Long Call
- Long Put
- Long Call Spread
- Long Put Spread
- Short Call Spread
- Short Put Spread
- Iron Butterfly (Short)
- Iron Condor (Short)
By combining these actions with your decision recipes, you can create automations that execute a wide range of trading strategies.
Finding Trades with Trade Idea Actions
In addition to predefined Open Position Actions, Option Alpha offers a powerful tool for discovering potential trade opportunities: Trade Ideas. This section provides a dynamic list of potential trades based on various market conditions.
Please note that not all symbols in our database are included in Trade Ideas, and the available ideas can change daily. For a complete list of the available symbols see our Supported Symbols.
Trade Idea Actions
Option Alpha offers two primary types of Trade Idea Actions:
- Multi-Symbol Actions: These actions incorporate a built-in symbol loop, allowing you to search for credit or debit spreads across multiple symbols and strategies.
- Find Credit Spread
- Find Debit Spread
- Single Symbol and Strategy Actions: These actions are specific to a particular symbol and trading strategy, providing focused trade discovery. Actions are available for all strategies except Long Equity.

By utilizing Trade Idea Actions, you can enhance your automation's ability to identify and capitalize on profitable trading opportunities.
Combining Decision Recipes and Open Position Actions
The synergy between Decision Recipes and Open Position Actions is crucial for building effective automations. By carefully defining your trading conditions and desired trade types, you can create sophisticated strategies that adapt to changing market dynamics.
Remember to thoroughly test your automations using historical data before deploying them with live capital.


'%3e%3cg id='Final-Copy-2_2_' transform='translate(1275.000000, 200.000000)'%3e%3cpath class='st0' d='M7.4,12.8h6.8l3.1-11.6H7.4C4.2,1.2,1.6,3.8,1.6,7S4.2,12.8,7.4,12.8z'/%3e%3c/g%3e%3c/g%3e%3c/g%3e%3cg id='final---dec.11-2020'%3e%3cg id='_x30_208-our-toggle' transform='translate(-1275.000000, -200.000000)'%3e%3cg id='Final-Copy-2' transform='translate(1275.000000, 200.000000)'%3e%3cpath class='st1' d='M22.6,0H7.4c-3.9,0-7,3.1-7,7s3.1,7,7,7h15.2c3.9,0,7-3.1,7-7S26.4,0,22.6,0z M1.6,7c0-3.2,2.6-5.8,5.8-5.8 h9.9l-3.1,11.6H7.4C4.2,12.8,1.6,10.2,1.6,7z'/%3e%3cpath id='x' class='st2' d='M24.6,4c0.2,0.2,0.2,0.6,0,0.8l0,0L22.5,7l2.2,2.2c0.2,0.2,0.2,0.6,0,0.8c-0.2,0.2-0.6,0.2-0.8,0 l0,0l-2.2-2.2L19.5,10c-0.2,0.2-0.6,0.2-0.8,0c-0.2-0.2-0.2-0.6,0-0.8l0,0L20.8,7l-2.2-2.2c-0.2-0.2-0.2-0.6,0-0.8 c0.2-0.2,0.6-0.2,0.8,0l0,0l2.2,2.2L23.8,4C24,3.8,24.4,3.8,24.6,4z'/%3e%3cpath id='y' class='st3' d='M12.7,4.1c0.2,0.2,0.3,0.6,0.1,0.8l0,0L8.6,9.8C8.5,9.9,8.4,10,8.3,10c-0.2,0.1-0.5,0.1-0.7-0.1l0,0 L5.4,7.7c-0.2-0.2-0.2-0.6,0-0.8c0.2-0.2,0.6-0.2,0.8,0l0,0L8,8.6l3.8-4.5C12,3.9,12.4,3.9,12.7,4.1z'/%3e%3c/g%3e%3c/g%3e%3c/g%3e%3c/g%3e%3c/svg%3e) Your Privacy Choices
Your Privacy Choices