Efficiency is one of the key advantages of using automation in trading. With less manual trading, you have more time to discover, refine, and scale your strategies. One of the most powerful tools for increasing bot functionality on Option Alpha’s platform is the use of custom inputs. This guide will help you understand how to use inputs effectively, the hierarchy involved, and the best practices for managing these inputs.

What Are Inputs?
Custom inputs are variable fields within your automations that you can link and edit in the future. They provide a convenient way to manage and update key values without having to edit each individual instance within an automation. By using inputs, you can change a value in one place, and that change will automatically apply wherever the input is referenced in the automation.
For example, if you create a custom input for a ticker symbol within an automation, you can reference that input throughout the automation. Then, if you need to change the ticker symbol later, you simply update the custom input, and the change is reflected everywhere that input is used.
Input Hierarchy: Automation-Level vs. Bot-Level Inputs
One of the most important concepts to understand is the hierarchy of inputs. In Option Alpha, you can manage inputs at two levels:
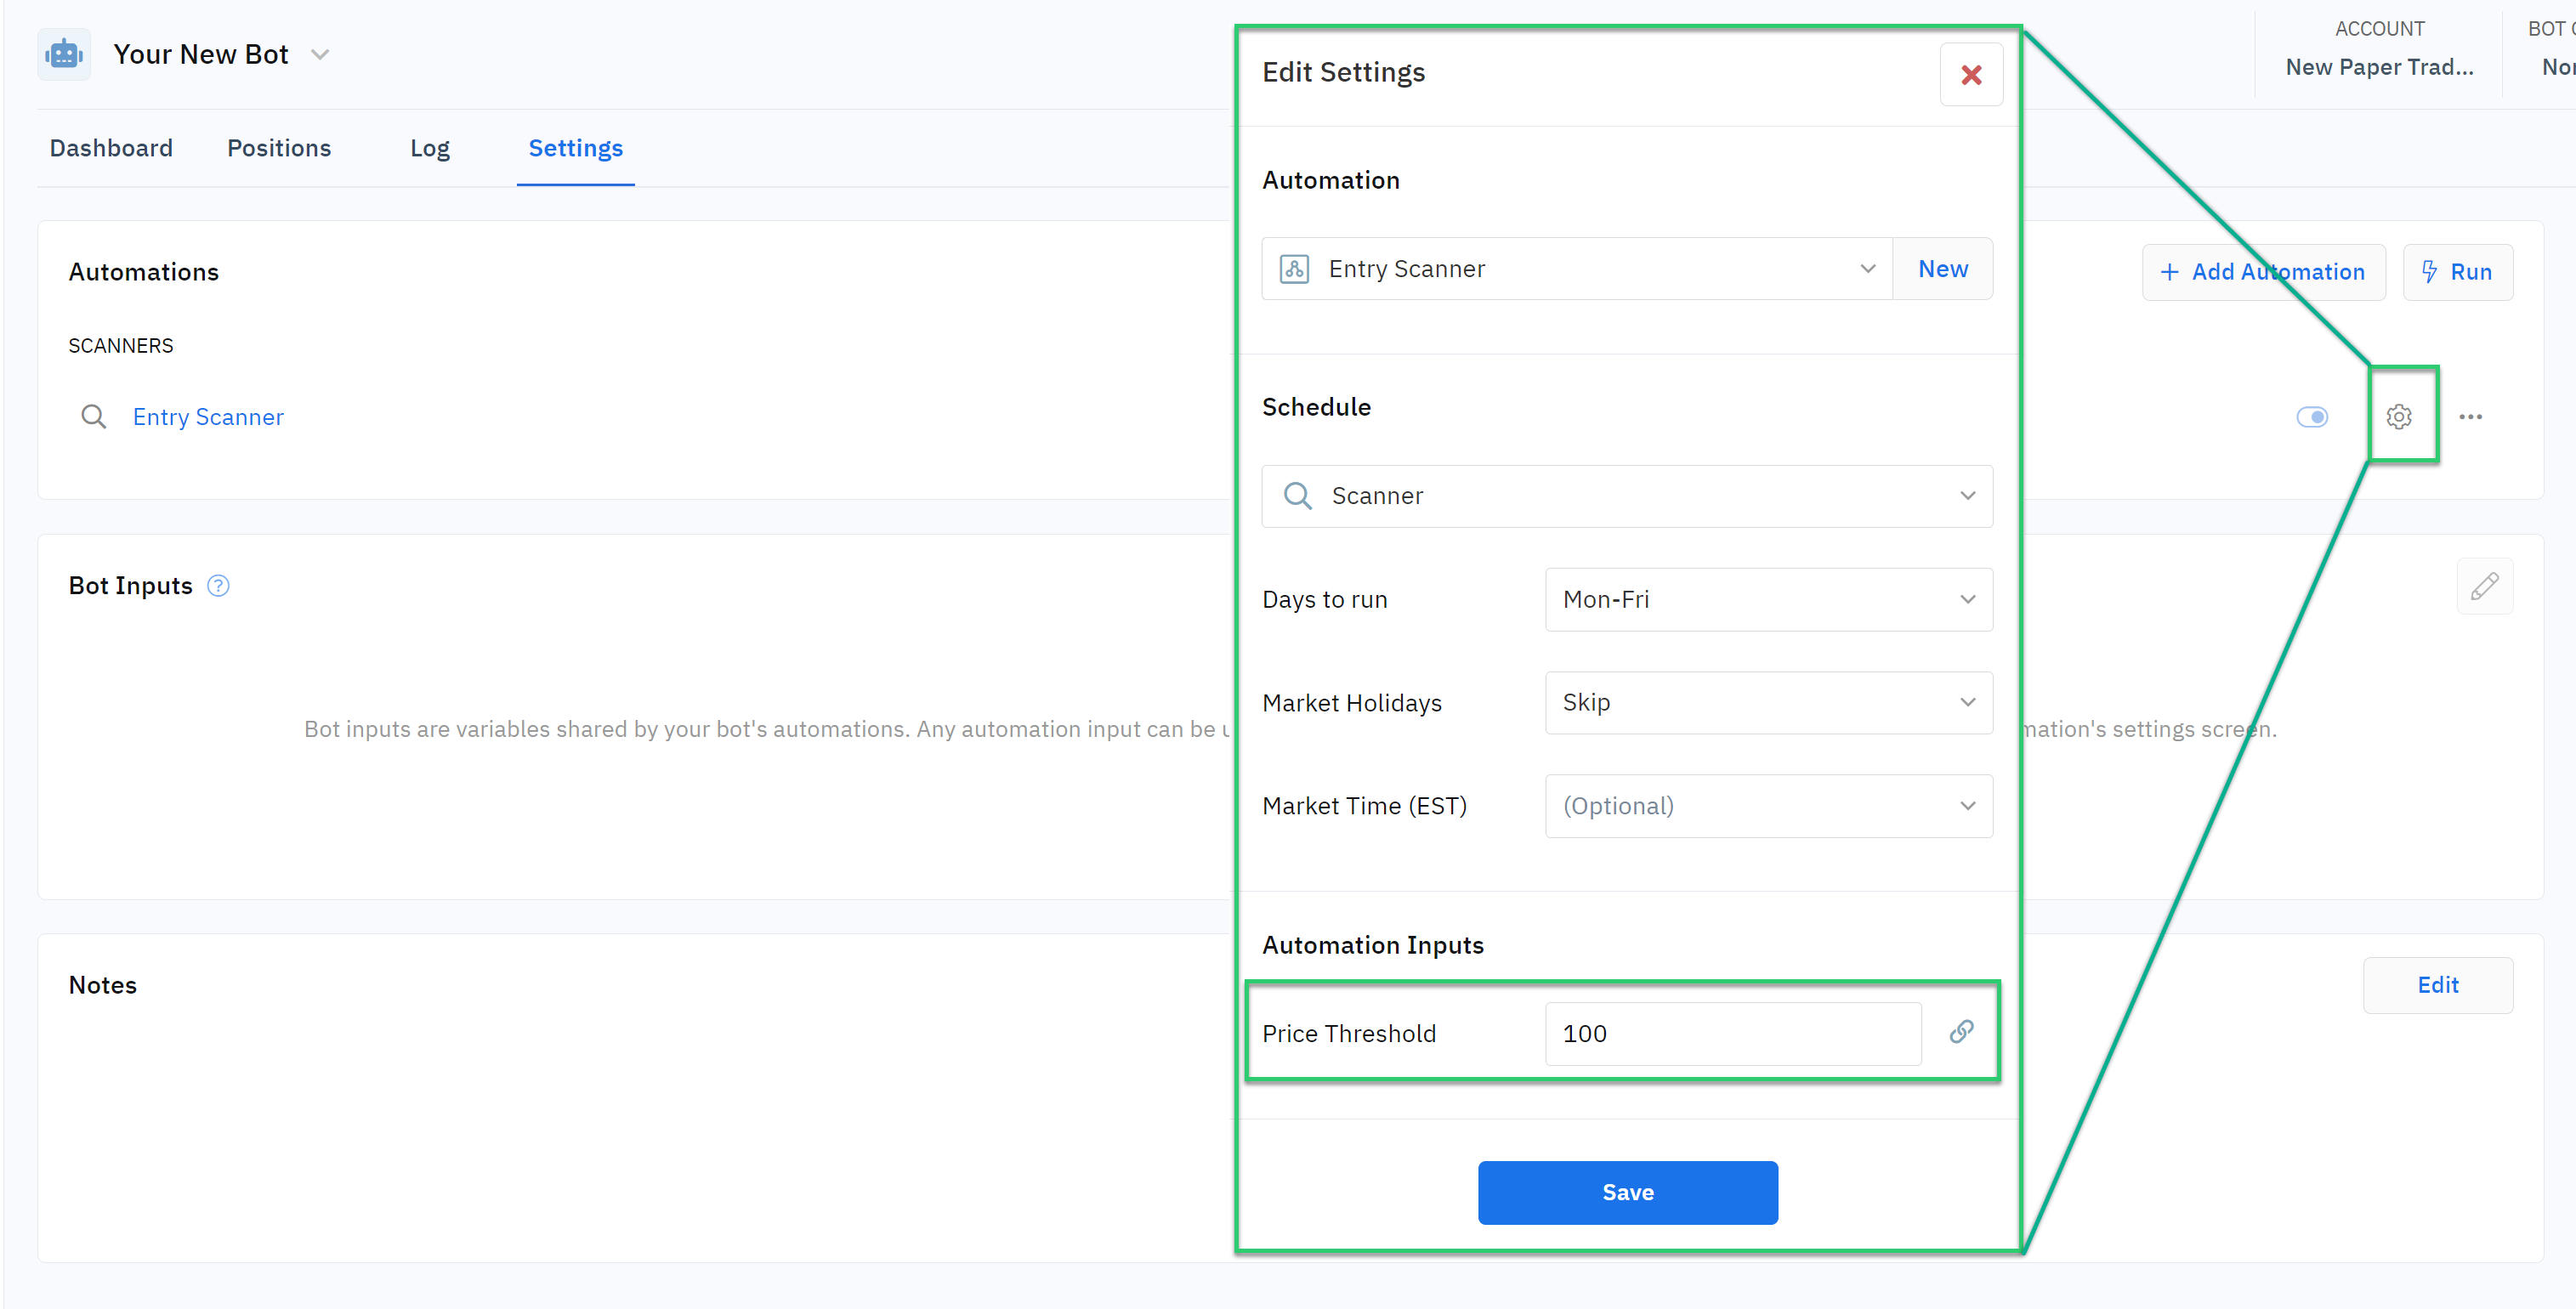
1. Automation-Level Inputs: These inputs are defined within a specific automation. They can be modified directly in the automation's settings panel and will affect all instances of that input within the automation.
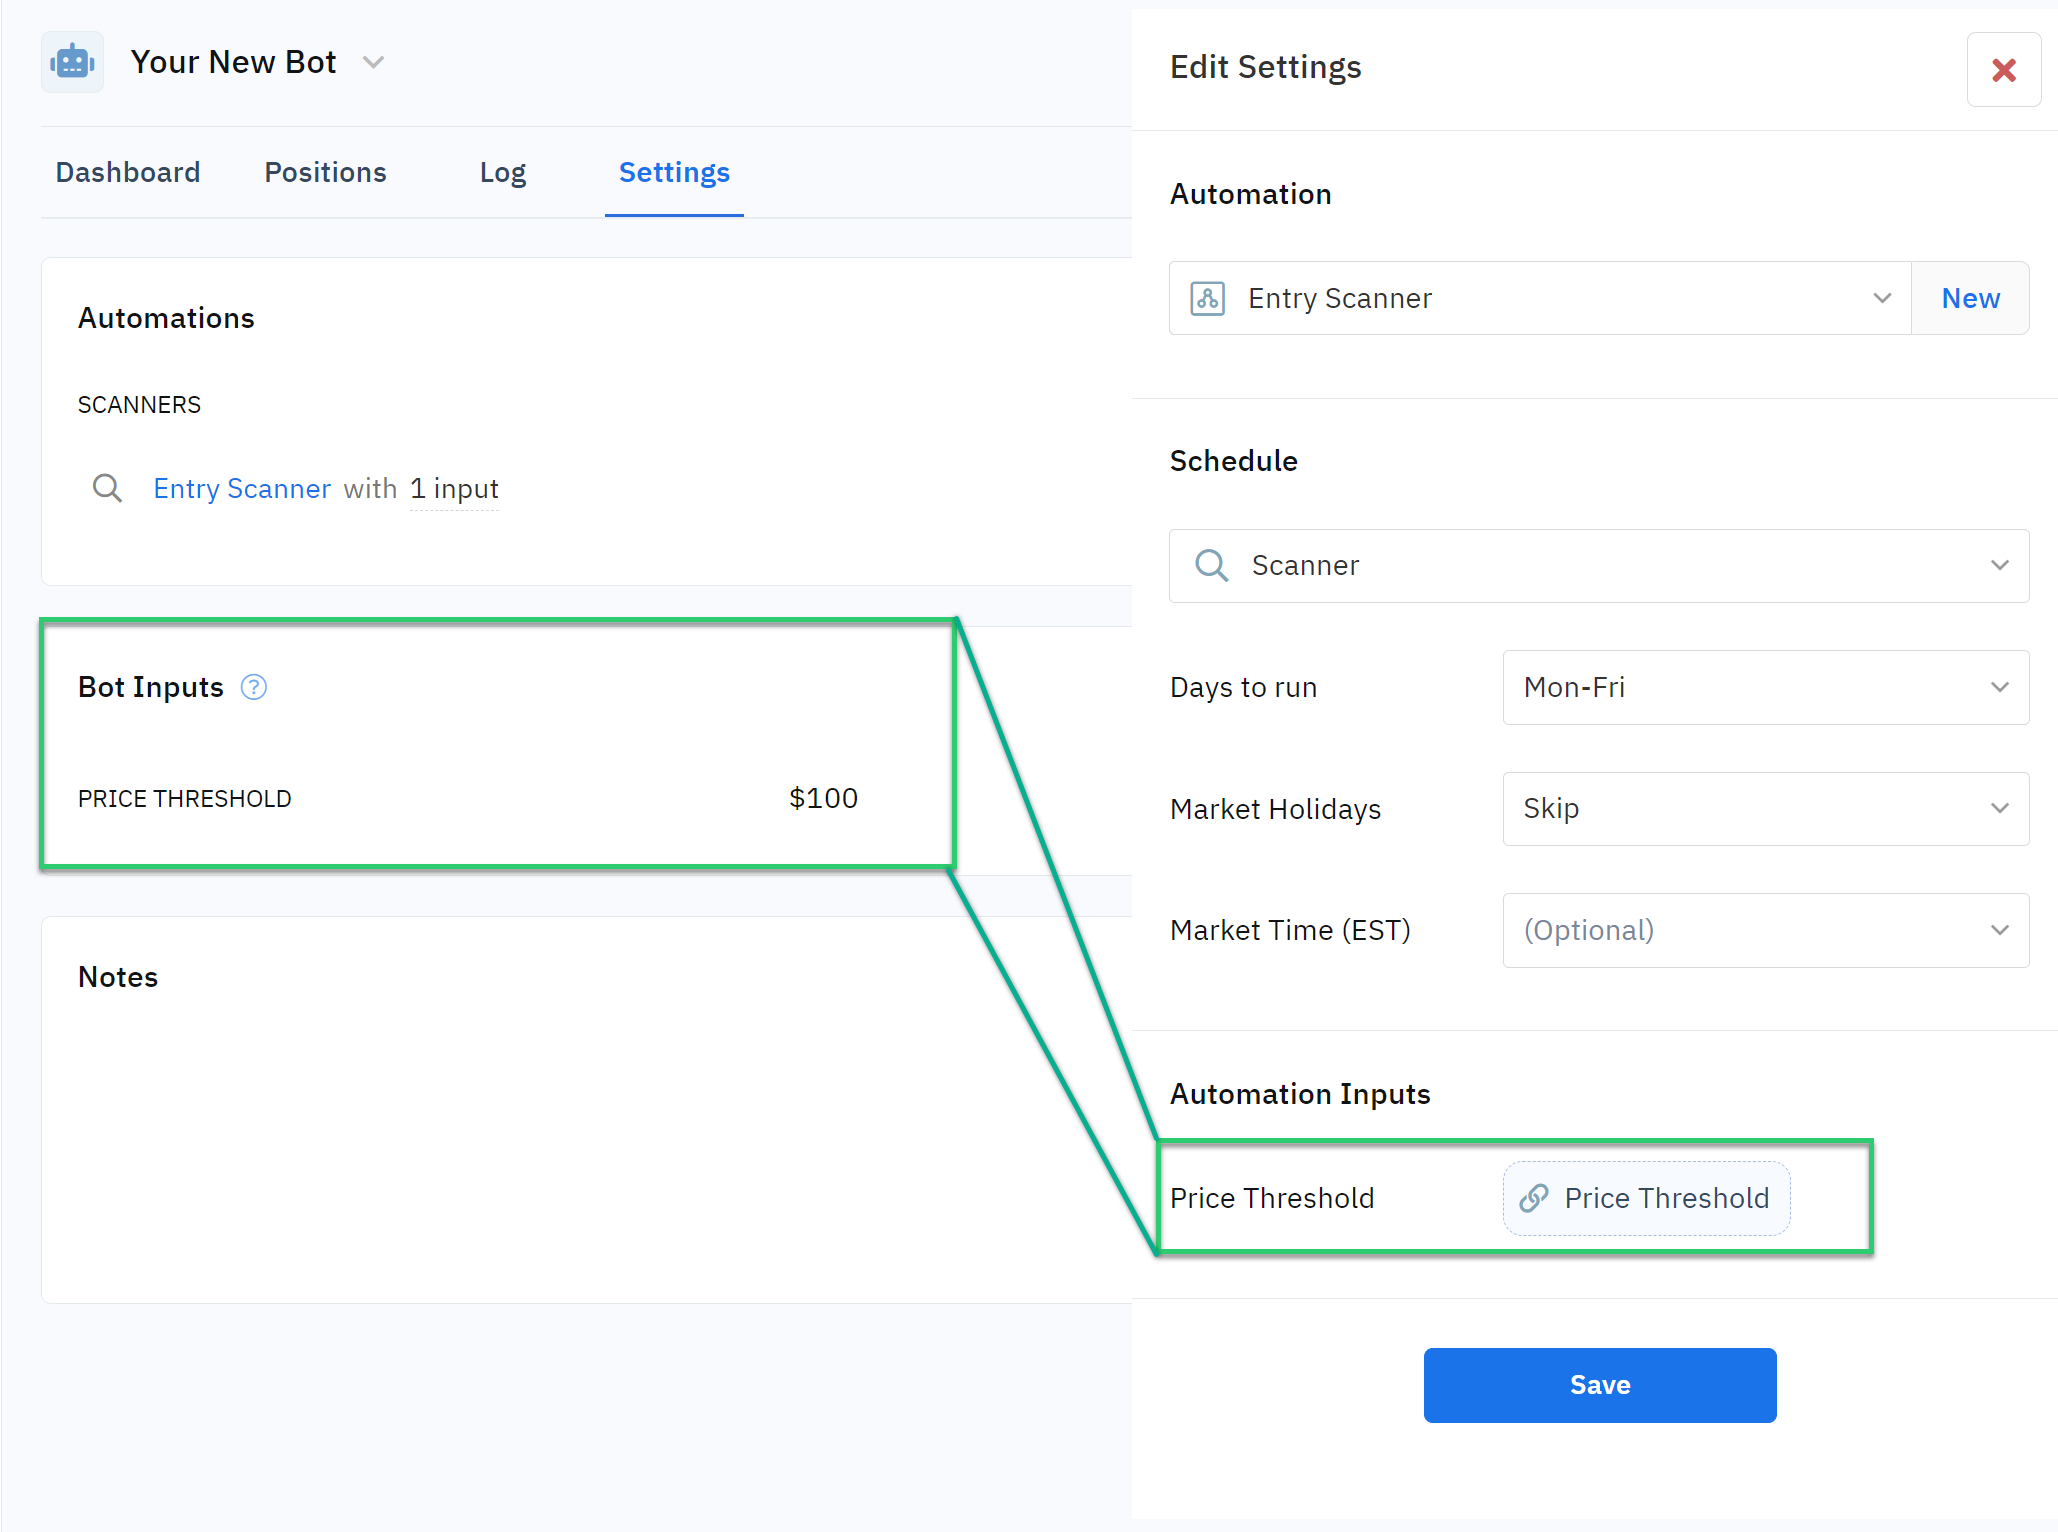
2. Bot-Level Inputs: These inputs are defined at the bot level and can be used across multiple automations within the same bot. Bot-level inputs allow you to manage key variables from a central location, the Bot Settings panel, providing a higher level of control and convenience. By moving an input from the automation level to the bot level, you can change values without diving into each individual automation.
Best Practices for Managing Inputs
Once you establish custom inputs, it’s crucial to manage them effectively to maintain the efficiency and flexibility they offer. Here are some best practices:
- Avoid Editing Inputs Inside the Editor: Once an input is established outside the editor, whether at the automation or bot level, all changes to that input should be made in the respective settings panel. This ensures consistency and prevents errors that could arise from making changes directly within the editor.
- Centralize Input Management: By moving key inputs to the bot level, you can manage them from the Bot Settings panel. This centralization simplifies the process of updating values and ensures that changes are applied consistently across all automations within the bot.
- Reuse and Scale with Inputs: Inputs are especially useful when you plan to reuse an automation in different bots or scenarios. By defining inputs that can be easily modified, you can quickly adapt the automation to different contexts without reworking the entire setup.
Custom inputs are a powerful feature that can significantly enhance the efficiency and flexibility of your trading bots on Option Alpha. By understanding the input hierarchy and following best practices for managing inputs, you can streamline your trading processes, save time, and focus more on optimizing your strategies.


'%3e%3cg id='Final-Copy-2_2_' transform='translate(1275.000000, 200.000000)'%3e%3cpath class='st0' d='M7.4,12.8h6.8l3.1-11.6H7.4C4.2,1.2,1.6,3.8,1.6,7S4.2,12.8,7.4,12.8z'/%3e%3c/g%3e%3c/g%3e%3c/g%3e%3cg id='final---dec.11-2020'%3e%3cg id='_x30_208-our-toggle' transform='translate(-1275.000000, -200.000000)'%3e%3cg id='Final-Copy-2' transform='translate(1275.000000, 200.000000)'%3e%3cpath class='st1' d='M22.6,0H7.4c-3.9,0-7,3.1-7,7s3.1,7,7,7h15.2c3.9,0,7-3.1,7-7S26.4,0,22.6,0z M1.6,7c0-3.2,2.6-5.8,5.8-5.8 h9.9l-3.1,11.6H7.4C4.2,12.8,1.6,10.2,1.6,7z'/%3e%3cpath id='x' class='st2' d='M24.6,4c0.2,0.2,0.2,0.6,0,0.8l0,0L22.5,7l2.2,2.2c0.2,0.2,0.2,0.6,0,0.8c-0.2,0.2-0.6,0.2-0.8,0 l0,0l-2.2-2.2L19.5,10c-0.2,0.2-0.6,0.2-0.8,0c-0.2-0.2-0.2-0.6,0-0.8l0,0L20.8,7l-2.2-2.2c-0.2-0.2-0.2-0.6,0-0.8 c0.2-0.2,0.6-0.2,0.8,0l0,0l2.2,2.2L23.8,4C24,3.8,24.4,3.8,24.6,4z'/%3e%3cpath id='y' class='st3' d='M12.7,4.1c0.2,0.2,0.3,0.6,0.1,0.8l0,0L8.6,9.8C8.5,9.9,8.4,10,8.3,10c-0.2,0.1-0.5,0.1-0.7-0.1l0,0 L5.4,7.7c-0.2-0.2-0.2-0.6,0-0.8c0.2-0.2,0.6-0.2,0.8,0l0,0L8,8.6l3.8-4.5C12,3.9,12.4,3.9,12.7,4.1z'/%3e%3c/g%3e%3c/g%3e%3c/g%3e%3c/g%3e%3c/svg%3e) Your Privacy Choices
Your Privacy Choices