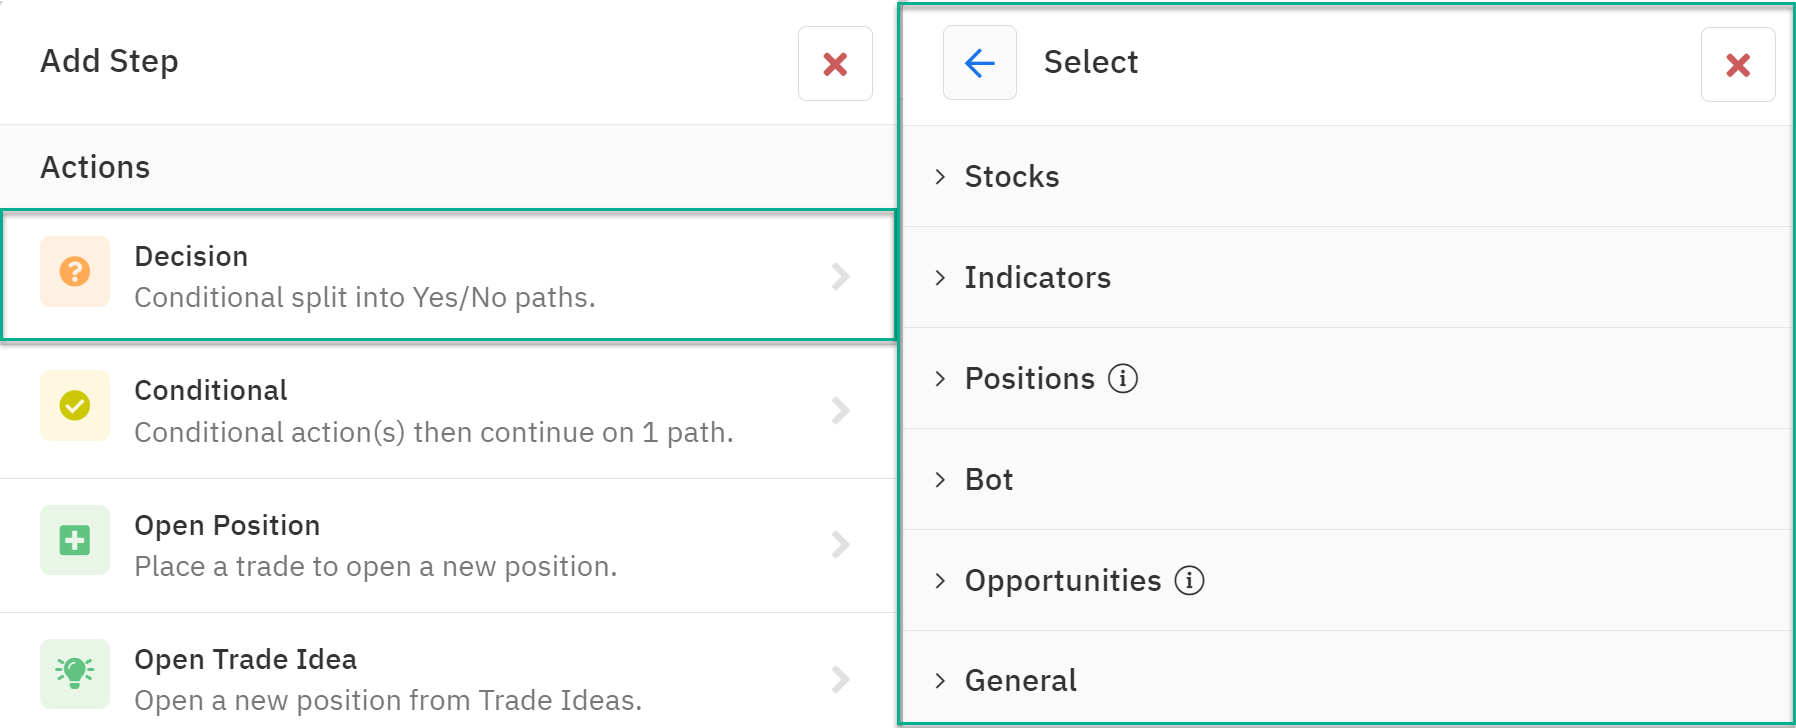
Decision recipes are the core components of creating sophisticated trading automations. These pre-built logic blocks handle a wide range of conditions, from simple price movements to complex market indicators and trade performance metrics. By understanding and effectively combining these recipes, you can construct automations that align precisely with your trading strategy.
Types of Decision Recipes
- Symbol-Based Decisions: These recipes focus on the characteristics of a specific symbol. You can evaluate its price, volatility, or other properties specific to the symbol referenced.
- Indicator-Based Decisions: Based on technical indicators, these recipes allow you to assess market trends and conditions. You can set conditions on daily closing values of indicators for the assigned symbol.
- Position-Based Decisions: Evaluate the performance of an open position using various metrics and statistics. These decisions are crucial for managing risk and optimizing profits.
- Bot-Based Decisions: Analyze the behavior and performance of your bot itself. You can check specific bot properties and metrics to make adjustments to your strategy.
- Opportunity-Based Decisions: Focus on the characteristics of a potential trade opportunity before it's opened. You can filter opportunities based on specific criteria.
- General Decisions: These versatile recipes cover broader conditions like time of day, day of week, and economic news events.
Building Your Automation Logic
Decision recipes are the building blocks for your automation's logic flow. By connecting these recipes in various combinations, you can create complex conditions that trigger different actions. For example, you might combine a symbol-based decision (price above a certain level), an indicator-based decision (RSI overbought), and a time-based decision (specific trading hours) to open a short position.
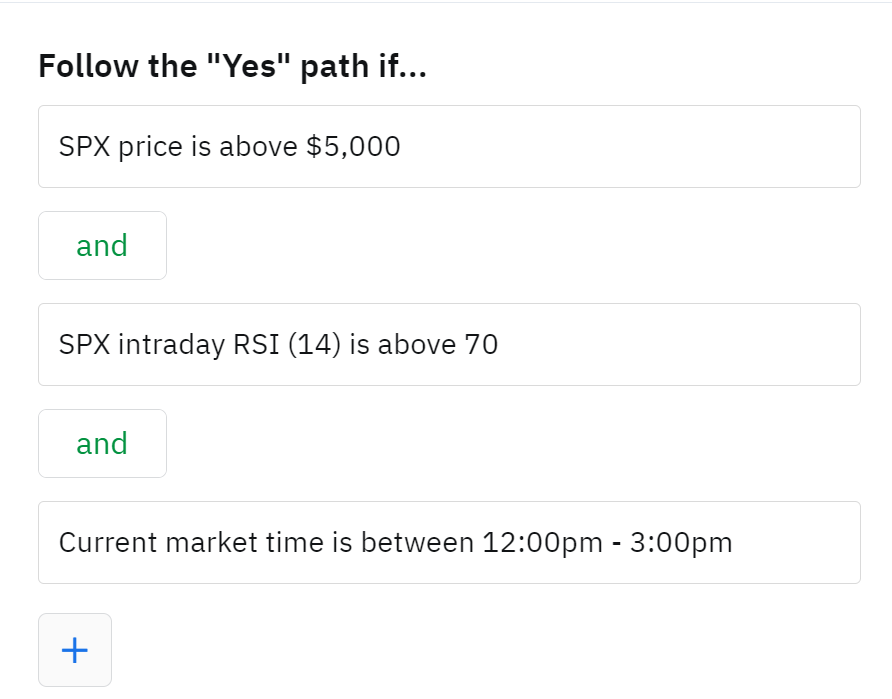
Additionally, you can group decisions together using Or and And conditions which enhances the logic being checked even further. For example, you may want to check for a situation where one, or the other, conditions could be true for a trade to be attempted. Lets build off the previous example; in this case we'll use an Or condition to build a decision that is checking if the RSI is overbought above 70 or that the price is above Bollinger Band High Band Level.

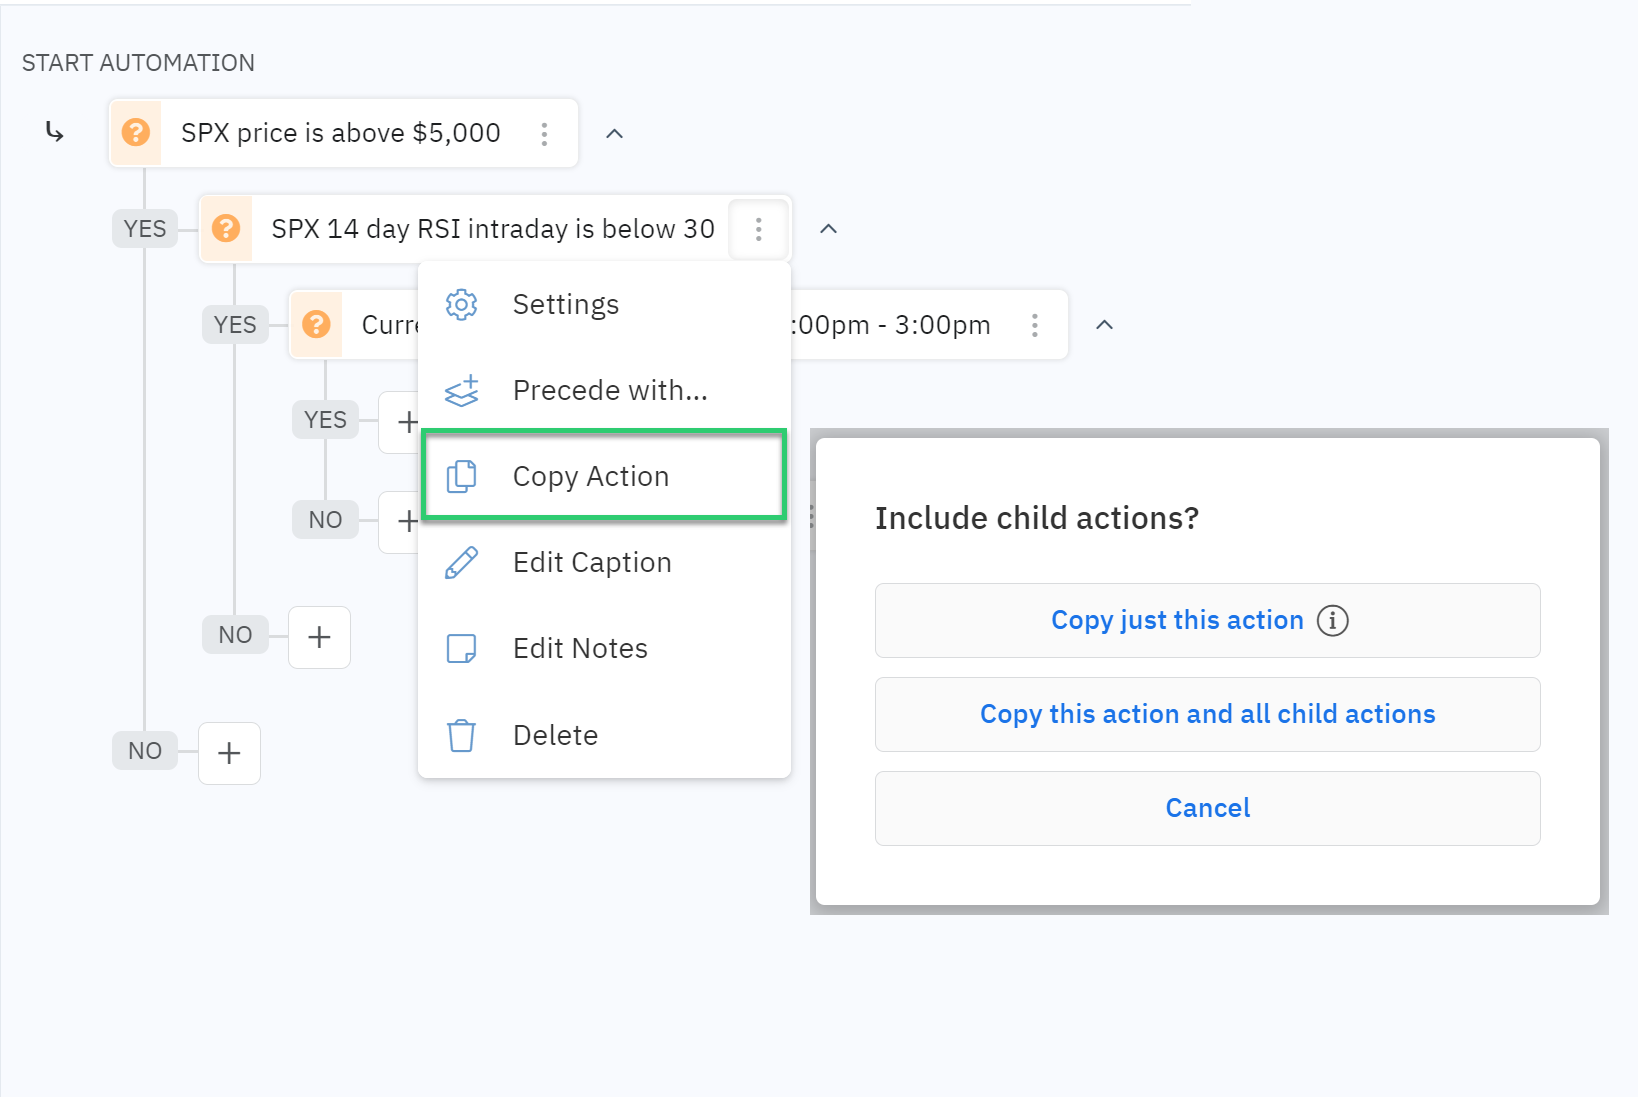
Leveraging the Editor for Efficiency
Option Alpha's editor is designed to streamline the automation building process. One of its powerful new features is the ability to copy and paste groups of decisions. This allows you to reuse complex logic structures across multiple automations, saving you time and effort.
By mastering the art of combining decision recipes, you can create highly customized and effective trading automations. Experiment with different combinations to find the strategies that best suit your trading style.


'%3e%3cg id='Final-Copy-2_2_' transform='translate(1275.000000, 200.000000)'%3e%3cpath class='st0' d='M7.4,12.8h6.8l3.1-11.6H7.4C4.2,1.2,1.6,3.8,1.6,7S4.2,12.8,7.4,12.8z'/%3e%3c/g%3e%3c/g%3e%3c/g%3e%3cg id='final---dec.11-2020'%3e%3cg id='_x30_208-our-toggle' transform='translate(-1275.000000, -200.000000)'%3e%3cg id='Final-Copy-2' transform='translate(1275.000000, 200.000000)'%3e%3cpath class='st1' d='M22.6,0H7.4c-3.9,0-7,3.1-7,7s3.1,7,7,7h15.2c3.9,0,7-3.1,7-7S26.4,0,22.6,0z M1.6,7c0-3.2,2.6-5.8,5.8-5.8 h9.9l-3.1,11.6H7.4C4.2,12.8,1.6,10.2,1.6,7z'/%3e%3cpath id='x' class='st2' d='M24.6,4c0.2,0.2,0.2,0.6,0,0.8l0,0L22.5,7l2.2,2.2c0.2,0.2,0.2,0.6,0,0.8c-0.2,0.2-0.6,0.2-0.8,0 l0,0l-2.2-2.2L19.5,10c-0.2,0.2-0.6,0.2-0.8,0c-0.2-0.2-0.2-0.6,0-0.8l0,0L20.8,7l-2.2-2.2c-0.2-0.2-0.2-0.6,0-0.8 c0.2-0.2,0.6-0.2,0.8,0l0,0l2.2,2.2L23.8,4C24,3.8,24.4,3.8,24.6,4z'/%3e%3cpath id='y' class='st3' d='M12.7,4.1c0.2,0.2,0.3,0.6,0.1,0.8l0,0L8.6,9.8C8.5,9.9,8.4,10,8.3,10c-0.2,0.1-0.5,0.1-0.7-0.1l0,0 L5.4,7.7c-0.2-0.2-0.2-0.6,0-0.8c0.2-0.2,0.6-0.2,0.8,0l0,0L8,8.6l3.8-4.5C12,3.9,12.4,3.9,12.7,4.1z'/%3e%3c/g%3e%3c/g%3e%3c/g%3e%3c/g%3e%3c/svg%3e) Your Privacy Choices
Your Privacy Choices